


How to Put Peel and Stick Backsplash Around Toilet? Expert 7-Step Guide
|
|
Time to read 6 min
|
|
Time to read 6 min
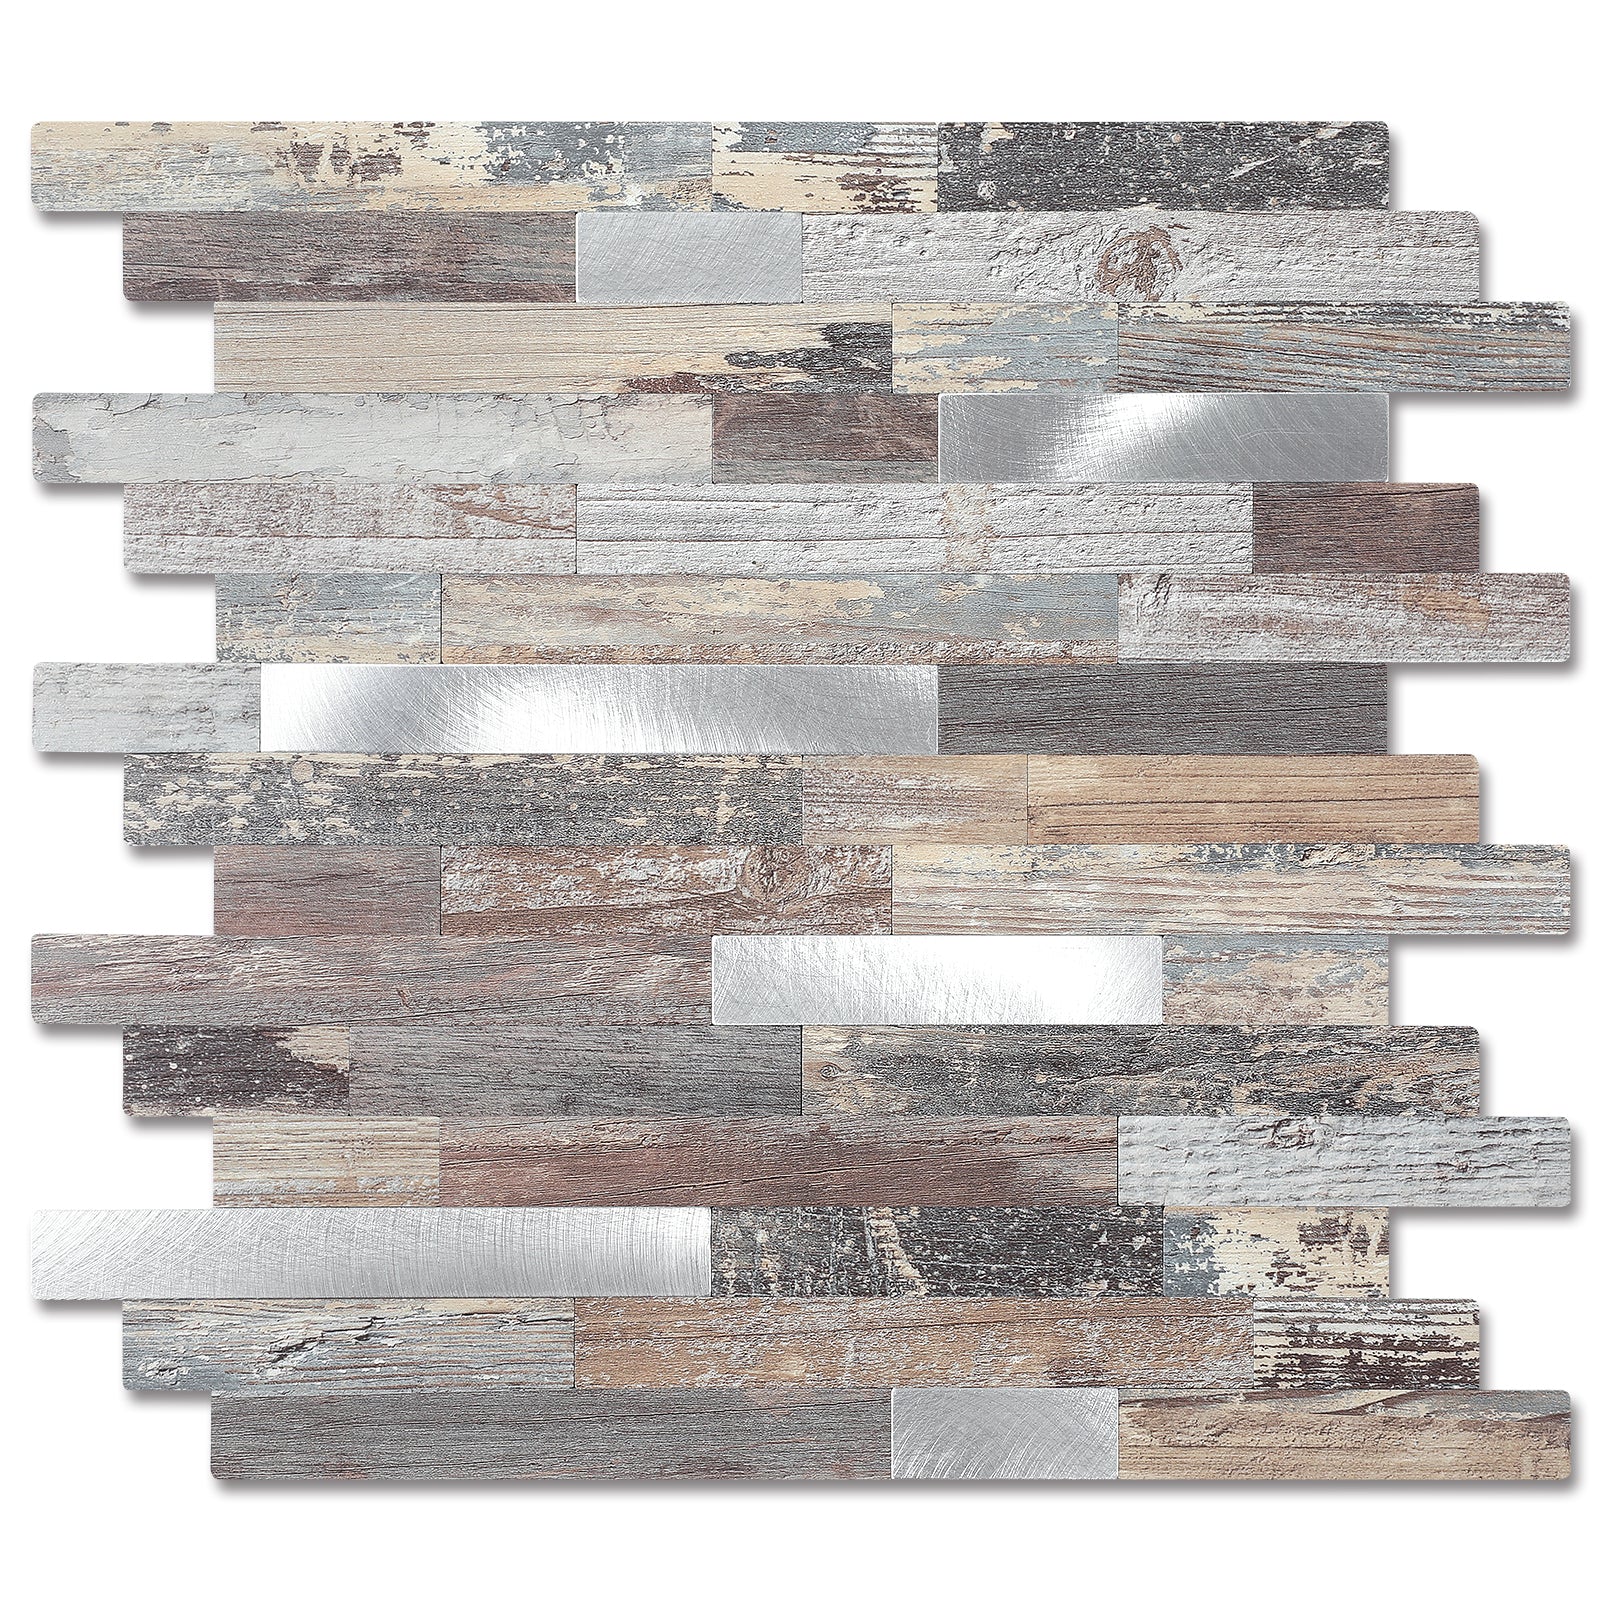
Peel and stick backsplash tiles are cost-effective, water-resistant, durable, and easy to apply. Step away from traditional and costly tile solutions, which cost over $500 and require 3-4 days. Get your bathroom tile makeover done for only $50. Never put a backslash before? Don't worry, these tiles don't need cement and hustle, just measure, cut, peel off, and stick.
Are you looking for an easy and quick tutorial to put these tiles around your toilet? Then this is a perfect guide for all those who are deciding to give a quick makeover to their bathrooms. From selecting the right material to curing and cleaning, you will learn everything in only 7 simple steps.
Table of Content
Installing these tiles is easier than you think. To give a fine and professional bathroom tile makeover, you need the right tools and materials. Grab heavy-duty scissors for cutting around the curves of tiles, and a sharp knife for sharp cuts, a laser level, measuring tape, and pencils to make sure your layouts are perfect. You'll need a template paper for tracing the curves around the toilet. To prevent moisture and lifting, use silicone glue around the corners.
While choosing peel and stick backsplash material for toilet areas, consider durable, waterproof and high-quality options like PVC/vinyl, resin, or aluminum composite. These tiles are best for humid places and can bear temperatures up to 300°F. Whether you are deciding on a complete bathroom makeover or just a toilet backsplash, choosing the right prep tools and materials can make a difference.
Wall pretreatment is the initial and important step. Begin by scrubbing the wall in the toilet area clean. Wipe with a damp cloth and allow the wall to dry completely. This helps the new material stick well during installation.
Arrange the tiles around the toilet without glue initially. This makes it easier for you to visualize where each tile will go. Create a paper template to cut tiles properly. Doing this prevents you from making mistakes and saves you time for cutting.
The next step is cutting the tiles accurately. For straight cuts, use a utility knife and ruler. Mark the tile and snap it neatly with the knife. For cutting the curve, you need to be careful, especially when placing peel and stick around the toilet. You can use a template paper and draw curves carefully, and cut the backsplash according to it.
Peel off the adhesive backing slowly from the tile. Set the tile in the intended position. Place it firmly to ensure that it adheres properly. This is done to ensure a proper and long-lasting grip around the toilet.
Add additional glue or sealer along the edges of the tiles. This prevents water from passing behind the tiles. Gently press the edges together to help them bond more effectively. It will make the edges sturdy and long-lasting.
Press the tiles firmly to dislodge air bubbles. Roll or hand-press for uniform compacting. This gets the tiles to bond flat and solid. Exhaust compaction creates the surface smooth and durable surface.
And when the tiles are installed, they should be left to dry off for at least a day. Don't walk or step over them. After 24 hours, clean the backsplash. Curing and cleaning the backsplash enhances the finished appearance.
1. Daily maintenance: If you want your toilet backsplash to last for years, then clean it regularly. Do not use harsh cleansers that can harm the surface. Inspect loose edges or peeling tiles for regular maintenance. Push down any raised corners to secure it. Replace broken tiles immediately before further issues.
2. Common problem repair: Repair peeling tiles by squeezing them with firm adhesive. Seal around edges with waterproof caulk to prevent water damage. Replace broken tiles with additional peel and stick scraps. Remove mold or stains with warm water and mild soap. Inspect edges regularly to correct small problems before they become large ones.
3. Warping edge: Warping edges occur when tiles do not adhere well. You can settle down the wrapped edges with a heat gun. Add additional adhesive if the tile continues to lift or warp. Seal the edge with caulk to eliminate future warping.
4. Scratches: Scratches on peel and stick tiles destroy the appearance. Minimize light marks with a soft cloth and mild cleaner. Deep scratches mean replacing the damaged tile as soon as possible. Refrain from using sharp objects to maintain the surface smooth and clean.
Mostly, the wall behind the toilet is exposed to moisture, dust, and grease. So skipping the wall pretreatment means wasting the stuff because tiles won't stick on a rough surface longer. Clean the wall before applying the backsplash to make sure the tiles stick properly.
Leaving the gaps between peel and stick backsplash can lead to long-term issues, like causing bubbles. It also makes the surface irregular. For a clean look, fill the gaps properly.
Many homeowners choose wrong or mismatched styles of tiles, which ruin the overall look of their bathroom. Whether you need a sleek, minimalist, rustic, or chic look, make sure your peel and stick backsplash matches your bathroom aesthetics.
Cutting tiles without proper measurements can cause rough and uneven corners. Take proper measurements and carefully cut the tiles for a flawless finish.
Peeling and repositioning peel and stick backsplash again and again can reduce adhesiveness. Place the tiles carefully to avoid a mess.
You can use a sharp utility knife if your cutting edge is not smooth, or sharpen the knife with a tool. You can also trim the edges with trimmers for a smooth finish.
Peel and stick tiles are water-resistant. They will not fall off when exposed to water, even after 48 hours, if applied correctly.
Removing the backsplash will not damage the wall. But you need to be careful. Gently remove the tiles by loosening the adhesive and peeling them off smoothly.
A caulking agent is not necessary to use, but it is recommended to use it near the edges for extra durability.
Peel and stick backsplash is a durable, budget-friendly, and sustainable option for a beautiful and entirely chic bathroom tiles makeover, and is easy to put up even in delicate areas like around the toilet. You just need 4 hours to refresh the look. This simple and quick guide will help you with your tile backsplash renovation. From smooth cutting to precise placement, by following every step, you can easily put the peel and stick backsplash around the toilet like a pro.
Do you know the best thing? You don't need to be professional. Collect your tools, follow the easy steps, avoid the usual mistakes, and perform simple maintenance, and you will see how your space will remain fresh and beautiful year after year. What are you waiting for? Create a smooth finish and don't let this weekend go spoiled.


