


My Honest Review of Vinyl Peel and Stick Floor Tile
|
|
Time to read 5 min
|
|
Time to read 5 min
Aesthetic walls and floors were always my dream until I discovered (and tried) vinyl peel and stick floor tile. With high inflation and many expenses, we always put renovations at last. I used to do the same. But these self adhesive tiles proved to be a game changer, and I can bet the same for you. Unlike traditional tiles, they are quick to install, affordable and do not need professional assistance.
So, whether you are a renter or a budget-conscious homeowner, check out my honest review of vinyl peel and stick floor tiles and learn how to achieve your renovation goals.
Table of Content
MY whole renovation project with vinyl tiles revolved around budget and I was very concerned about it. So, first, I drew an estimation of the total cost involved in just buying the tiles, and the results blew my mind. The tiles were around 1$ - 5$ per sq.ft, while traditional materials cost $70 -250$ per sq. ft for a bathroom refresh. The rest of the installation cost was additional.
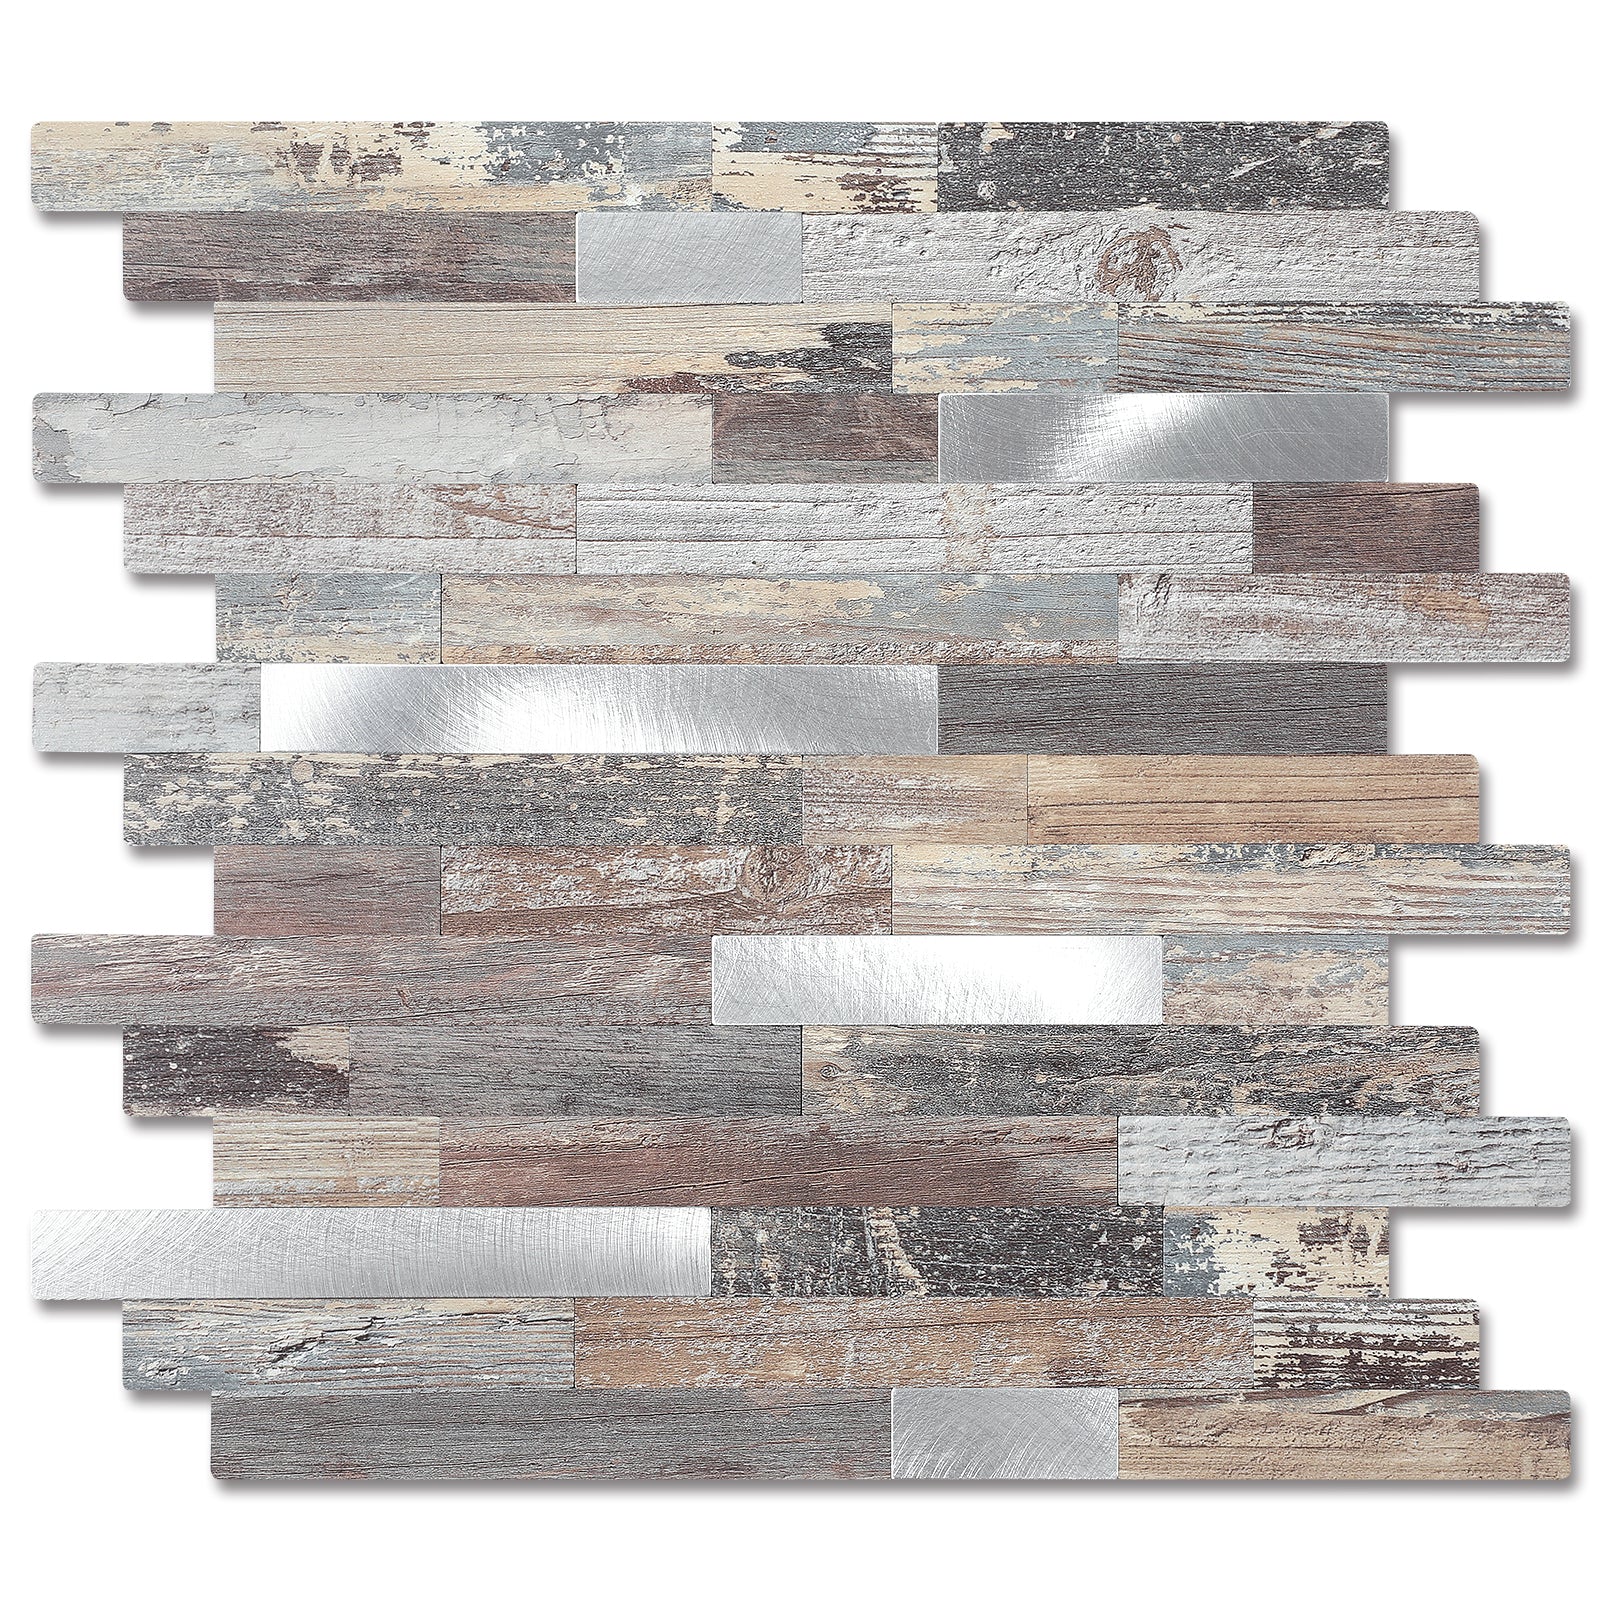
Secondly, vinyl peel and stick tiles provide a huge range of designs. You can choose from wood, marble or retro patterns as per your preferences. That was a big win for me!
Once everything is decided, you can move on to the next step that is – installation of tiles.
Make sure to keep these tools with you before directly diving into the installation steps:
Further Readings
→ How to Clean Tile Floors No Matter What Type (and Grout Too!)
→ Peel and Stick vs. Luxury Vinyl Plank 2025 Cost Durability Test Results
The floor must be clean and dry. You can sweep or vacuum to remove any dust or debris. Mild cleaners also work great to remove oils or grease. I used common home detergent to make the floor spotless and let it dry before proceeding.
Also, I filled some bumps with floor patching compound to ensure maximum adhesion on the even surface. You can do the same.
Next, lay the tiles flat on the ground and let them acclimate to room temperature (65 o F or 18 o C) for 48 hours.
Now is the time to put tiles on the floor. Don't go random! Work on the centerline method to find a center point to avoid uneven appearance on the edges. First, measure the length and width of the place –then mark the midpoint on each wall with the chalk line. Now, connect these points and create a cross at the center of the room.
For symmetrical alignment, you can begin tile installation from the center point, not from the walls. You may also need to cut the tiles near the walls. Utility knives or sharp scissors can easily cut straight lines for clean edges.
In another case, toilet bases, pedestals, or closets can make the installation challenging. Don't directly cut the tiles to fit in the place. Instead, create a paper template by tracing the shape you need to cut. Once the template is ready, transfer the shape to the tile and cut it carefully.
I understand complex shapes can be tricky, but you can do it with patience and practice.
Sometimes, peel and stick flooring doesn't come up the same way. The tile edges may lift and lose adhesion after installation. This happens due to air bubbles or fluctuations in the room temperature. Here double-sided carpet tape proves its quick solution. Placing heavy objects on the tiles can also help.
Pattern mismatch is the second most common problem I faced during my project I fixed it by just rotating tiles (90 o ) for better alignment.
After layering the tiles, use a floor roller over the surface to ensure they are adhered properly.
Appropriate care and maintenance can add life to your vinyl floor tile. So, be gentle with them and don't use any harsh chemicals or magic erasers. The Spruce also says mild detergent or a wet wipe can make them shine.
Similarly, the tiles can withstand spills for a short period, but prolonged exposure to the moisture can result in edge lifting.
Considering all the key factors, installing these tiles in low-traffic bathrooms, closets or rental units is best. Kitchens with greasy stains, entryways or damp basements can compromise their sticking power.
Yes, vinyl peel and stick tiles are renter-friendly for their low cost, easy installation and removal for a quick update.
Yes, you can install vinyl peel and stick tiles over existing tiles. Just be sure the old tiles are flat, secure and free from any damage.
No, grout is not required when installing vinyl peel and stick tiles. Their adhesive back creates a smooth and uniform surface without the need for grout between the tiles.
Lastly, I strongly believe you have a quick and budget friendly renovation option without breaking your bank. But it can save you for a short period and give your space a whole new look as a temporary upgrade. You can keep more reliable and long-lasting alternatives such as LVT (Luxury vinyl planks) or ceramic tiles in mind for long-term renovation plans.


